
Have you heard of Zoom? It is one of the most popular video conferencing platforms being used right now for distance learning. Zoom is a pretty easy platform to use once you get started. Here are some easy tips and tricks for using Zoom in your classroom.
Home Screen
Once you sign up for Zoom, the easiest way to manage your meetings is by downloading the “Zoom Client.” This will be an application on your computer that you will use to either create, schedule, or join a meeting. When opening the application, this is what you will see: If you are ready to immediately launch a meeting, click the orange “New Meeting” button. To join a meeting, click “Join.” If you would like to schedule a future meeting, click “Schedule.” To just share your screen with someone, click “Share Screen.” If your district or school does not allow downloads, you can also manage and create sessions directly from the Zoom website.
Scheduling a Meeting
To schedule a future meeting, click “Schedule.” Then, you’ll see this window.
Security Features
On this window, you can title your meeting, set the beginning and ending time, and set a password for the meeting if desired. Be sure to click on “advanced options.” These additional options provide important security features for your students. When you click on “advanced options” this is what you’ll see: These two features are key security features for your meeting. The waiting room enables participants to wait and be allowed to enter in when the host gives permission. This not only gives you time to make sure all the features of your Zoom session are set the way you would like, but it also allows for you to make sure you are only letting your students join. “Mute participants on entry” will save your sanity! You won’t have 30 third graders all talking at once when they join. If you go into settings on your Zoom account online (not the Zoom Client), you can set additional security features such as not allowing participants to share their screens, automatically saving records of the chat, preventing participants from saving a chat, turning off private chat (the ability for participants to chat 1:1), disabling participants ability to record a meeting you set up, and setting a recording disclaimer before recording begins. Be sure to spend some time going through the settings prior to your first Zoom Session.
Test Out Zoom
Reach out to family members or friends and try out Zoom with them before meeting with your students. This is your time to figure out any bugs or test out settings. It is a lot easier to figure out issues with close friends and families than with a whole class of fourth graders!
Find a Fun Background
Where would you like to teach from today? The beach? Paris? The moon? Zoom allows you to upload a virtual background that will mask whatever is behind you. Zoom backgrounds are easy to upload. To use a virtual background, click the arrow to the right of “Stop Video” (or “Start Video” if your video is not on at the moment) and then select “Choose Virtual Background.” You will then be given a choice of standard backgrounds to use, or you can upload your own! Click the + sign to the right to upload your own background. If you have a picture of your classroom, this is extra fun and your students will love it! Of course, it’s always fine to use your real-life background too! Your students will appreciate seeing where you live and work.
Think About Lighting
Lighting placement is important in Zoom. Have lighting to the side of you or in front of you. If your main lighting is behind you, your face will be difficult to see.
Share Your Screen and Record Your Class
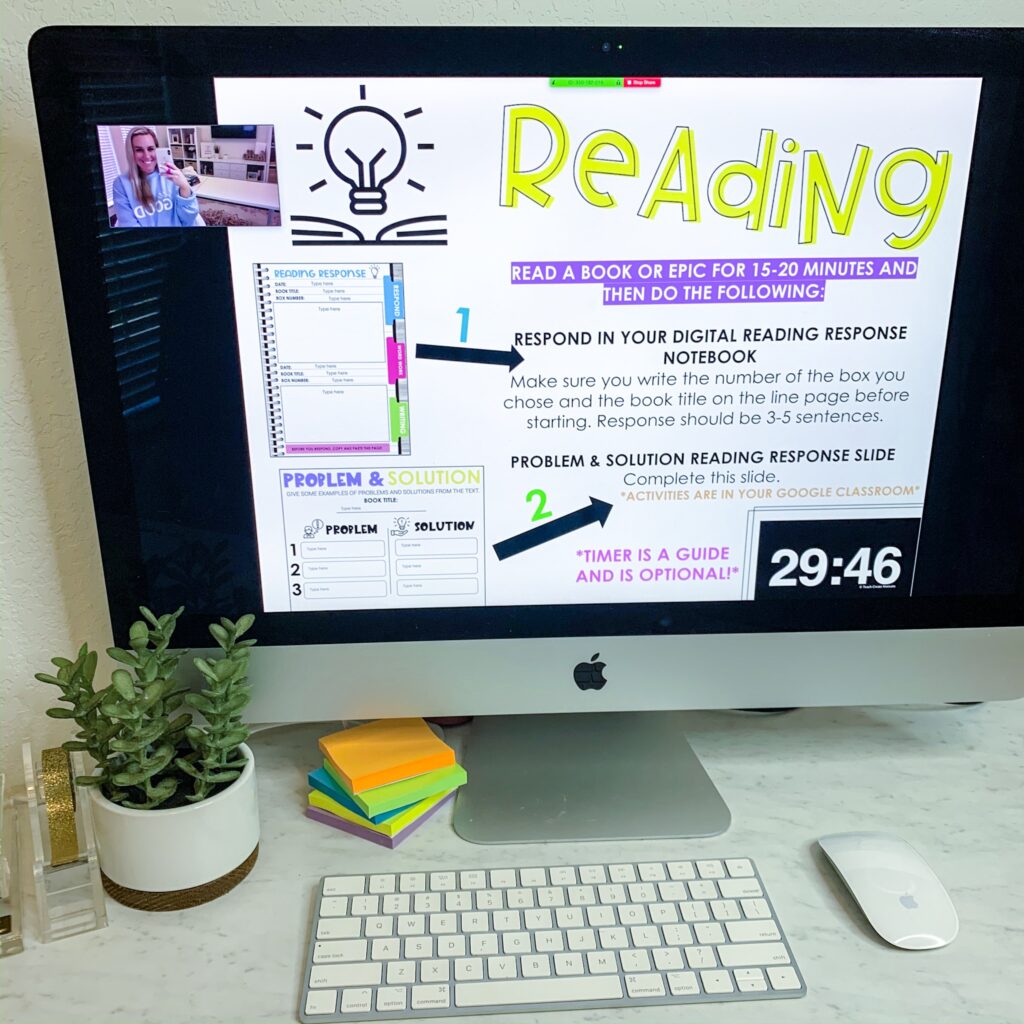
This is one of the best aspects of Zoom! Zoom allows you to share your screen easily. You can share your entire desktop or just one application. Be sure you know what you want to share ahead of time so you don’t accidentally share something you don’t want them to see, like your email. To share your screen click on the green “Share Screen” in the middle of the bottom of your screen.
This option is so perfect for sharing your class slides with instructions and information! You can share your slides as you explain different activities and expectations. You can even model for them how to complete digital activities like their digital reading response notebooks or digital check in journal. If you are also giving them the slides with timers a guide for their school week or day, this is a great way to go over everything just like you would in class!
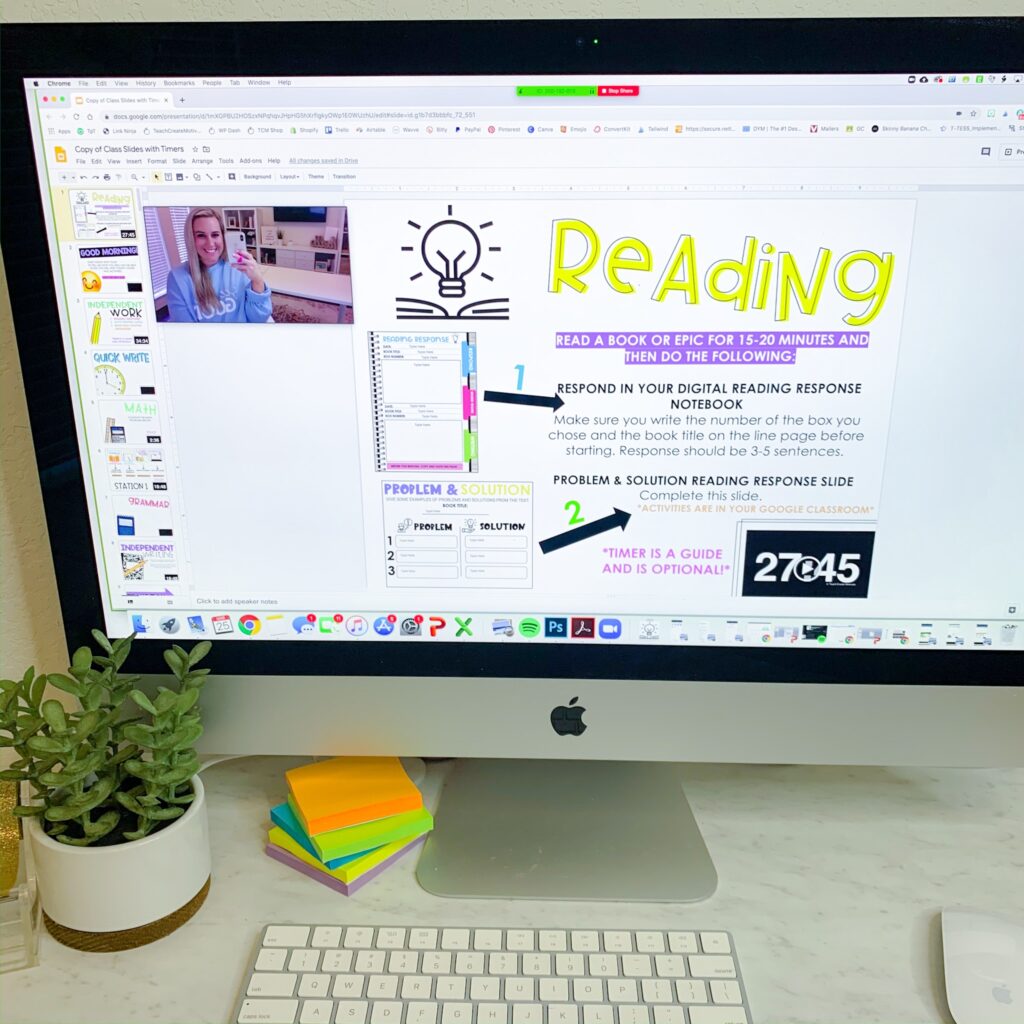
You do have the option of recording your class session. This is great for students who could not be present and may view the session at a later time. Be sure to review your district policy for recording students and let students and parents know in advance you are recording. To record, click “Record” at the bottom of your screen. You can pause and stop the recording at any time. When you are done, your Zoom session will be converted to an mp4 file. Do not post your recordings on a public site. However, you may choose to email them to parents or share on a secure site like Google Classroom or Seesaw if you have district and parent permission.
Ideas for Zoom
- Go over class instruction slides for the day or week
- Model digital activities
- Conduct morning or class meetings
- Go on virtual field trips
- Display and discuss a digital classroom management game
- Student shares/show and tell
Use Your First Zoom Session to Go Over Netiquette
This is new for everyone! The first time you Zoom with your students, go over your norms for virtual class sessions. How do we talk in the chat? How do we ask a question? When should we have our mics muted or our camera turn off? Figure out what norms you want in place and know they may change or be added to as your class gets used to Zoom. Ready to Zoom? Zoom is a fantastic way to connect with our students virtually. Hopefully, these tips and tricks will help you feel confident to give Zoom a try!
Want to save this post to read again later? Pin the image below!

 SPRING ACTIVITIES



Leave a Comment