

Teach Create Motivate Podcast
Getting file data...
Show Notes
Amy Groesbeck is a teacher in Texas with experience in 3rd and 2nd grade. She received a degree in Elementary Education from Texas State University, where she also earned a Master’s degree in Curriculum and Instruction. Her greatest passion in teaching is instilling a curiosity for learning, while cultivating an environment where creativity and self-discovery takes place every day. Amy shares creative teaching resources and classroom management tips on her educational blog, TheAnimatedTeacher.com. This year, Amy is enjoying being a stay-at-home mom, as she continues to create and share innovative classroom resources, fonts, and teaching tips on Teachers Pay Teachers and Instagram
MEET THE ANIMATED TEACHER, AMY GROESBECK
Ashley: Hi Amy, thank you so much for being on today’s episode. How are you?
Amy: I am so good! Thank you for having me.
Ashley: Can you go ahead and tell us about you? And then we’ll get started into talking all about anchor charts.
Amy: Okay. Well, I am a Texas teacher. I have taught third and second grade. I originally received my elementary education degree at Texas State University where also received my master’s degree in curriculum and instruction. One of my greatest passions in teaching is just instilling a curiosity for learning and creativity. And I feel like I do that through my teaching practices pretty much every day. So this year though, I am enjoying being a stay at home mom, getting to create and share teaching ideas online through TPT. And that’s been a really rewarding thing for me this year.
Ashley: That’s awesome. That’s great. And I know you still share so much on your Instagram and your blog and through your store. So I’m really excited to talk about anchor charts just because I feel like when anyone goes to your page, you are obviously like Anchor Chart Queen. So, um, I don’t just want to talk about obviously like the cuteness of your an anchor chart pictures, but you have a lot more to say and help us learn more about anchor charts in general. So, tell us about your passions in teaching. What are some of your passions in teaching?
Amy: Well, like I said, just instilling that love for creativity and curiosity and collaborating with others. And so I think a lot of that comes out through my creation of anchor charts. Showing and modeling my students how, you know, your own creativity can be expressed in different ways. But then also through, you know, creating anchor charts is still purposeful and it’s a really powerful learning tool. So it has kind of double, double meaning for me.
Ashley: Cool. So you’ve taught third grade and second grade? And I currently teach third grade. Which would you say you liked better?
Amy: Well, I love both. I’ve taught third grade a longer. Oh, I think I’m a little biased. . I have more experience and third grade. I just love it, the age group of third graders because they come to really with the skill set of knowing how to read. And I get to dive more into like the thinking and the critical thinking, getting them prepared for just really deep, rich thinking. I really enjoy their age group as well because they’re still impressionable but you can be silly and animated and goofy and they still love it.
Ashley: Yes, that’s exactly what I tell people too. Cause I taught second grade my first year and then I moved to third and I am like team third all the way. And like you, I don’t really have much to compare it to but it’s a perfect age. But based on today’s topic, if people are listening and they teach kinder or first or they teach fourth or fifth, I feel like everyone can take something from today. Do you agree?
Amy: Absolutely. And I think that anchor charts are still a powerful tool even in middle school.
Ashley: Awesome. So today we want to dive in and talk all about using anchor charts in the classroom. Um, so tell us a little bit about your view and use of anchor charts and you can just dive right into whatever you want to tell us. Then we’ll talk more specifically in, you know, a little bit.
Amy: Okay. Well, I know that like showing my anchor charts on Instagram lots of people always comment like they’re so cute and artistic, but for me, that’s just me expressing my creativity. The purpose behind making and using anchor charts is really is to support academic learning for students. And my belief is that they’re excellent tools because they support student learning goals. They help students review concepts that are being taught or have been previously taught. And then also it can establish learning expectations. And so one thing that I always try to tell people is that it’s really important to include your students’ integration of anchor charts because then they’re engaged in the learning process. And they’re more likely to refer back to those charts if their ideas and their thoughts are displayed.
Ashley: Right. And they’re probably more likely to retain the information as well. So how has using anchor charts changed your classroom?
Amy: Well, like I said, it can increase student engagement. So, you know, as I started using anchor charts and then getting my kids involved in the process of sharing information and answering questions, it kind of just became the catalyst for deep discussions and peer-to-peer dialogue. So I would pre-write questions or have the topics already provided on my anchor chart.
It’s the students’ task to just think and respond. So I noticed that because of that more of my students were sharing input and offering their thinking and were getting excited because I was writing their responses on that on the chart. We would also use sticky notes. So I would tap out sticky notes and my kids could respond. I would collect them, I would’ve read them out loud, share who responded. Then we them on this, the anchor chart as well.
Amy: It kind of became the culture of my lessons. And when we came to whole group carpet, my students knew that we were creating anchor charts and that it was time to share. So their input became really valuable. And then I started doing more of interactive charts and one subject area where I did a lot of that spelling. It really transformed my spelling instruction.
So I would start the lesson by providing the pattern that you’re working on that week and I would give examples and then I would have my kids practice and write examples in their notebooks as well. But then as the week went on, we kept it going and they would find and discover their own words and they would go and write the word on the anchor chart themselves. So throughout the week it was an ongoing task. They were excited. They were really motivated to find and discover their own words. And then of course in their own handwriting.
Ashley: I think like it can be hard I think for teachers to know the balance of do I just display this anchor chart or do I start with this as a blank anchor chart? And also with spelling, I feel like spelling can be tricky to teach in a way that your students really, I guess grasp. I don’t know, it’s something hard to kind of have something displayed for it I guess in my opinion. So to do that, I think that’s really good for your kids because they’re interacting with it. Like you said, not just this 30 minute lesson on the carpet or whatever, but all week long. Then do you guys like revisit it on Friday or anything?
Amy: Yeah, we do. We would revisit. We would go through the words that we discovered and we added to the chart and then of course during our spelling tests I would cover the chart. It was a really cool way for my kids really to internalize the pattern because they were working with this chart all week. And of course they were doing word work and things in their notebook, but it was also a way for them to display to the whole class the words that they were finding as well.
Ashley: Right. So how would you say, cause you said students need to be involved, but obviously the teacher needs to, like I always say teacher-guided, student-led kind of thing. So how would you recommend to teachers who are listening, because I think sometimes teachers just need a little bit of guidance like, well how can I do this? If you’re saying this is the best way to do it, this was worked for you, how would you tell teachers to do that? Like where it’s student engaged and students are leading it, but obviously the teacher has kind of guiding it in the direction needs to go to.
Amy: Right well with anything, of course we need to be prepared to ask questions and kind of guide them and scaffold those discussions. So what I always do with my anchor chart, it’s prepared portion of the chart before I did meet with students. And a part of this is often just for time management because I say your students should be involved, but that doesn’t necessarily mean for me I’m starting with a blank anchor chart. You know, because we’re writing titles, we’re writing questions, we might be adding graphics. I have a very short limited amount of time for my lesson, so I want to utilize that as much as I can for discussion and learning.
So I always come to our lessons with our anchor charts, perhaps with the headers, discussion topics, questions and graphics. So then I’m able to use, that kind of as my outline or my skeleton for my lesson and making sure to hit the key points and vocabulary that I want to demonstrate. Then everything else is really student led and I posed the question.
Amy: My kids turn and talk, they discuss with one another or they discuss the class and then we add their insight. There are times when, of course I need to write a formal definition. So I’ll take their input and I’ll rephrase it. I think every teacher knows that trick. We’re revoicing their ideas but we already have that definition \but it’s still allowing them to share and then they’re internalizing what they’re saying. And then like I said before, they’re more likely to reference it in the future because it’s their idea.
Ashley: Yeah. And you were kind of saying that whenever you come to do an anchor chart together, they kind of already know like this is a sharing time. What did you say at the beginning that you established it so much to that now your students know, what’d you refer to it as? Like share or just the group time?
Amy: Yeah, so they anticipated that anytime there was an anchor chart, they were definitely going to be discussing and sharing.
Ashley: Good. Yeah. I liked that too. And I think consistency is always really good too. I know I struggle with consistency of anchor charts because time is an issue for every teacher. So sometimes I do really, really well with it. And then other times I’m just like, “oh, that was an anchor chart from two weeks ago.” So I’m, I’m always learning from this too. So that’s really good. So what would be your number one or few tips regarding anchor charts for teachers who are listening?
Amy: Okay, well like I mentioned several times, of course your kids need to be involved. I did mention though I come to the whole group lessons with the anchor chart already prepped. So my suggestion to teachers would be if you’re kind of feeling overwhelmed, like how am I going to start this chart? I would use my planning time or after school planning time to prep a chart. And oftentimes I would sketch it in pencil first. Whatever I was going to prep beforehand you know, of course I would color with marker.
But even sometimes, if I had definitions I needed to know or my kids need to know, I would lightly sketch those in pencil so that the formatting was there and I knew everything fit. And then my kids didn’t really see that. And then you know, I wrote over it so it looked like it just happened in the moment. But I had already planned for it. So that’s one thing that teachers can do is prep it beforehand. I definitely don’t think that you should come to your whole lesson with the chart already filled out because then I feel like you’re going to have less buy-in and your kids are going to zone out.
Ashley: For sure. It’s like more like a poster then.
Amy: Exactly. There’s been a lot of debate on the differences between posters and anchor charts and posters obviously have a place in the classroom and are valuable tools. But I wouldn’t say that an anchor chart is completed if it’s coming to the chart or coming to the whole group lesson already filled out.
Ashley: For sure. Any other tips that you would give or those the main ones?
Amy: Another tip I would say is you don’t have to reinvent the wheel. I know a lot of teachers will go to Pinterest or Instagram to look for ideas and that is a great resource. Teachers like myself or other teachers that share on Instagram or Pinterest do that because it is an instant way to collaborate. And then it’s also a great way to educate each other on strategies that have worked for us. Maybe other teachers haven’t thought of.
So if you see an anchor chart online or if you see an anchor chart in someone’s classroom. It’s okay to borrow it. Of course if you share it on social media, credit the designer. You don’t have to reinvent the wheel every time.
Ashley: That’s good. I think we sometimes think we do and we just don’t, so that’s good. So why would you say for teachers who are like maybe a little bit hesitant about jumping all in with anchor charts. Maybe they’re not being super consistent with it or for teachers who feel kind of maybe stuck thinking like, is this really helping, why would you say using anchor charts is really beneficial to classrooms?
Amy: The first thing I would say is yes, anchor charts are definitely helping your students. Because in my opinion, they are extremely powerful academic tools because they support a student’s learning goals. They help develop content vocabulary. They scaffold their understanding and honestly, they can also help the teacher by helping you sequence your lesson and ensure that you’re hitting the topics that you want to teach.
So the thing about anchor charts is that they can be created and displayed upon students’ need or they can be displayed throughout the year because students are constantly connecting new content to previously learned skills. And so I always leave my anchor charts up on the wall. They never, ever come down. That’s not to say that they’re all on display. So what I do, for instance in spelling, because each week we have a new chart. I treat it like a giant flip book and I just attached hooks on the wall and they become layered.
If a kid needed to refer back to an anchor chart, they just basically flip through it. And then we can move an anchor chart back to our whiteboard or front of the stack, if necessary. But making them accessible is really important because it’s a learning tool. And so like with anything else, like mathematical manipulatives or graphic organizers for reading, you want to make those available to your students.
Ashley: And probably tell them like you can come up here and relook through all of these charts. I feel like they think if you don’t tell them that or set that expectation, they think these are just like the teacher’s chart, you know, like this is the teacher’s material. So if you like say that and model that and show that, I think they’re more willing to, more likely to interact with them too.
Amy: Yeah. And that’s something that I also made sure to do with my own students was let’s say I were to move an anchor chart to different part of the room or I moved it from our whole group easel to a wall. I made sure to do that in their presence and I was very loudly announced, “Hey, this chart is now going to this part of the room or whatever. Just so they were aware because you have to train your kids how to use the anchor charts and also when you because you can’t automatically assume they’re going to know when and how to use the chart.
Also, give daily reminders. Like if we were starting an independent practice, I would say, we’re going to move into independent practice and this is for a grade, but if you get stuck and you need help, show me somewhere in the room where you could find a tool to help you. And then I would have everybody point to that anchor chart. So I knew they knew where to reference.
Ashley: So two questions come to mind with that. I might be jumping ahead, but that’s okay. The first question I have for you that maybe people are wondering too is like, okay, so you said you’d keep them up all year, you might layer them or whatever. So like for in third grade, you know, we’ve taught author’s purpose, but we’re reviewing it, right? So we’re coming back to it. So when we come back to it, what do you do? Do you bring that anchor chart back out or do you remake that anchor chart again? What do you do as far as when, especially I think in the testing grades, we review skills a lot towards this time of year. What would you say you do as far as anchor chart goes at that point?
Amy: Well, I think that you need to really do what’s best for your kids in your classroom. So I would actually say both would be the right way to go. So I have done that. I have remade anchor chart that we’ve done previously in a year or I have just taken one off the wall and reused it. And then instead of adding more to it actually on the chart we’ve just added information using sticky notes which sticky notes are one of my favorite anchor chart tools because it instantly makes your chart interactive.
Ashley: Especially with different like stories or texts. I mean, if you’re using a skill that you need to go over multiple times, sticky notes would be great for different stories or types of texts that you’re reading.
Amy: Yes, definitely. Like you were saying author’s purpose, I’ve done an author’s purpose chart, main idea charts where we started off and we defined all the different components. But then when we would use different mentor texts and we would just switch out the main idea and details with the sticky notes. So we got a lot of use out of one chart.
Ashley: So for he ones that are displayed, like obviously spelling, you said you cover up. I’m not talking about state testing, but your actual classroom assessments, whether that be a grade of any kind or a test that has to do with this skill that’s on the chart. Do you leave it up?
Amy: I do. I do leave it up because like I said, it’s just, it’s there to reinforce content and then also scaffold their understanding. So I wouldn’t say that the anchor charts necessarily give an answer. It just gives them the tips and tools they need to arrive at an answer or it gives them the strategy they need to be a thoughtful reader or fill out a certain kind of graphic organizer. So I always did leave up my anchor charts.
Ashley: Yeah, for sure. I mean, half of them might not even look at it, even though we’d want them to. So it’s not like that big of a deal. So what would you tell a teacher just starting out with anchor charts with their students or a new teacher? I know I get a lot of questions about new teachers. This is probably something that they’re wondering too, because when you’re student teaching you might not have this experience with anchor charts specifically. So what would you tell them about using anchor charts with their students?
Amy: Well yeah, because creating anchor charts and using these kind of tools are definitely something that you don’t learn in college. It’s definitely field practice. And so these are things that I had to learn throughout the years too. Like I said a million times involve your students so that they’re actively engaged. I think I’ve mentioned a lot of times like use sticky notes to your advantage. That way you can be collecting multiple responses and then again, you don’t have to start from scratch with a blank chart.
Come to your whole group lesson with some of it already prepared. And then I think another main thing too, and I try to tell people this on Instagram when they’re like, “how do you draw and write like that?” I just tell them, that’s just kind of my forte. I’m artistic and so I use that as an expression. But your anchor charts do not have to be artistic. They do not have to be beautiful. For me, the anchor chart needs to be, more importantly, it needs to be purposeful and rich of content so that students can look at it and get something from it.
So I would definitely say to new teachers, make sure that your anchor chart is legible and organized well, but make sure that it’s purposeful. And these are things that I’ve done too. In my first couple years, I would do a really messy job on an anchor chart and I’d be like, “oh my gosh, this is great information, but this is not pretty.” And so after school I would recreate it and make it more organized and attractive. So my students, as young learners, could actually read the writing and utilize the information. So I think that’s important.
Ashley: Yeah. Like it’s great if it’s cute, but it does not have to be to be beneficial. And I mean, we all want everything to be cute, but, and I don’t think there’s anything wrong with that. I know sometimes there’s like backlash online about teachers wanting things to be cute or whatever. And I think there’s nothing wrong with that. But when that becomes more important than the content and more important than the information that we’re giving our kids, then that’s where we need to do some self-reflecting for sure.
Amy: If you’re not artistic, but you want to add some art elements to your chart and find clip art and font and just trace it.
Ashley: Yes. That’s what I do. And then let’s get to the question that I feel like a lot of people do ask, probably you more than anybody, but I know that I’ve even gotten this question. So where do you display, well not where to do you display, but what are your tips for displaying your charts? How do you display them, I guess would be the better answer. And then what do you do for storage? Do you store them? Do you throw them away? Tell us what you do for that.
Amy: Okay well first off, I almost never throw away my anchor charts. They never come down usually during the school year, so I often store them at the very end of the year. So I’ll collect all of them by subject. I’ll roll them up with a rubber band and put them in a plastic storage bin. But I always keep them because I do recreate my anchor charts every year.
So again, I’m not trying to reinvent the wheel. So I will reference an old anchor chart that I made just to kind of see what information I can put on it as I’m designing an updated version. So during this school year, I keep all of my charts on display and I kind of just got creative in how I do that. So depending on the subjects, I just displayed them differently. With reading, since we would focus on one chart per week since we were like really focusing on one skill set. Those charts pretty much never came off the wall. I had space above my whiteboard and I just stapled them to the wall.
If I needed to take him down to review, we would do that. But they pretty much never were relocated. For math, since I’m teaching so many skills within a unit, I was constantly making math charts so they were everywhere. So I would display them on our easel using binder clips that way. I purchased a magnetic rod. Everybody has probably seen that on Instagram.
Ashley: I know, but every time I post that people are like, “Where’d you get that? That’s amazing.” That’s how we do our main one for the week or whatever. Or like I’ll put our main ones and then flip through them. So the magnetic rod is golden for sure.
Amy: And usually the anchor chart that was hanging from the magnetic rod was like the focus chart for the day or the week. And then one of my teammates was like, here are these curtain rod clips. So they were rings with little clips on them.
Ashley: That’s what I use. Cause I used to use binder rings and then it was so hard to get it off.
Amy: And then she showed me the clip and I was like, oh my gosh, genius.
Ashley: And they’re white and they matched the rod too.
Amy: So that was, um, one of the main ways I would display. And then for math, like I said, I would have tons, so I strung ribbon from one end to the other end. I actually just used like heavy duty ribbon but you could use twine if you wanted or the thin rope. But I basically created like a clothes line display and I would attach anchor charts with clothespins. You walked in the room and I mean they were boom right there. So you could definitely see them. Those were displayed within the unit that I was teaching. But maybe we had moved on from that skill, but we were still spiraling.
Ashley: That’s the hardest part with math because it’s like, you know for teaching place value, well there’s like 15 things I need them to remember and learn about place value.
Amy: So hanging them across the room with like the best idea. Then after maybe you moved on from place value and we’re moving on to fractions, or whatever. We wouldn’t necessarily be cross referencing those anchor charts. So then I would do like the flip book style, where I just kind of stack them and hang them on the wall with hooks. And we could take them down if we needed to.
Ashley: So for that you put like your spelling ones, you put hooks and then maybe binder rings on the hooks?
Amy: I actually just like I bought these, well see we had dry wall in our classrooms. So I was able to get these hooks that just like screwed into the wall. So I just threw them over my bulletin board paper. If you have like cinder block walls and you have walls where you’re not allowed to. Then you could do command hooks and then you can do binder rings and those clips. But that’s basically how I displayed all of them was like the flip book style as we recycled and we’re moving onto new skills.
Ashley: Because I definitely throw mine away at the end of the year or whatever and then I’m realizing that I have to go refind the one that I like to kind of sketch out for the kids. So when you store them for the next year and then you bring it back out to recreate it to with your students, do you then throw the last year’s chart away or do you just like literally keep all of them?
Amy: I have, well I have. So like basically, If it’s like a couple of years old, they start to turn yellow, I’ll be like okay I have recreated this so many times that I feel like I like the updated version better. Another thing that was going to share, I forgot to mention is it you have a smaller classroom or you don’t have as much wall space. Because I had tons of wall space my room. A really cool strategy that I’ve seen before is teachers will take pictures of their anchor chart and they will create an anchor chart binder and then have dividers based on the subject. So then your kiddos can just go grab the binder and turn to that page and then it’s right there.
Ashley: That’s awesome. Again, you’d have to show them and make sure they know. But that’s really cool. Great tip.
Amy: I never did do that, but I would love to do that in the future because I think that’s a really cool way to kind of compartmentalize all your charts and in a concise area.
Ashley: Awesome. Okay. And then a question that I’m sure everyone’s dying to know. What are your favorite tools to create anchor charts?
Amy: This is the question that people ask all the time. And I should become a rep for this company. Crayola is my go to brand. Like I swear by the markers because they have so many different colors and I mean you walk into any craft store or any education store and you can find this brand. So I always use Crayola, just the regular, broad tip markers. I don’t use any kind of fancy, smancy, bulletin board paper marker. And another thing I really love about Crayola is that they have those multicultural tone markers. So when I’m creating graphics of like students or kids, I can make sure that the kids are representing my students and with different skin tones. So that’s something else that really like.
Ashley: I know, I think people think you have to use those Mr. Sketch, which there’s nothing against Mr. Sketch. But like, that’s not the only marker you can use on an anchor chart.
Amy: And you know, honestly, because of the way the tips are designed on those markers, they don’t really work the best for me when I’m trying to color. I do like the way that they write, like word titles. But for coloring, I prefer Crayola. Sharpie markers are another one that I use often, especially when I’m like outlining graphics or writing big chunky letters. I like to use sharpie markers. And then again, like I said, a million times Post-It notes. I have such a huge collection of Post-It notes because we use so many. So those are probably my three top tools. Of course, the anchor chart tablet itself is important. I often get asked what type of chart I use, and I just use the standard 24 by 32 chart tablet, which is made by, I think it’s pronounced Pacon.
Ashley: Yes. Yeah, yeah. I don’t know how to pronounce it, but I know you’re talking about.
Amy: It’s a really popular education branding, you know, paper for bulletin boards. I was really blessed to work at a campus that had a supply closet from teacher’s dreams. So we would walk in there and everything we needed was there and including just a plethora of anchor charts. Oh, I never had to buy my own, but I know some people probably do have to provide them and I see them all the time on education websites and an office supply stores. So they’re really easy to come by if you search.
Ashley: For sure. Awesome. Okay. So Crayola, Sharpies and Post-Its. All right, well obviously you are passionate anchor charts you love using this tool and I know that you’ve brought it kind of to your TpT store and your Instagram sharing that stuff out. So where specifically, can we find, if a teacher is wanting to find more anchor charts from you or information from you, where can we go to find that?
Amy: Well, I do have a new blog post devoted all about anchor charts and I’ve shared a lot of the tips that we’ve discussed here today and I’ve also included tons and tons of pictures, and ideas of like how I start and how we finish the chart or even different types of anchor charts. Because I know I’ve talked a lot about how they’re anchoring learning, but I’m also used them to kind of monitor behavior and set expectations.
So I have lots of examples of those as well. If you go to Instagram and you search the hashtag, #theamygroesbeckanchorcharts, you’ll find all of the charts I’ve shared on Instagram. I usually always use that hashtag. They’re all collected in one little place. And then I also started creating digital templates that teachers can use to recreate in her terms. And so, they’re designed to be like projected on the board and then traced so that you kind of have that starting point of creating that rich content anchor chart. And those are my TpT store. I currently have six volumes in the math and I am currently working on reading, ELA. Yes. I get asked that all the time. I just want to like make sure I have all the skills before.
Ashley: I feel like I always forget one, too and I’m creating anything for reading. But I use your math ones a lot and I know that teachers really loved those because I feel like it does allow teachers to feel like, “oh, this is cute, but I know that it’s covering what it needs to cover.” And you did a really good job of kind of like separating them into different skills, especially with the math ones. Obviously it’s all you have right now out, but instead of it being maybe like one place value, you have it by the topic in math.
So I think that’s really, really helpful and I’ve never had to be like, oh, doesn’t have this chart that I need to teach this. So you have everything covered there and you make it really easy to project and trace but still make it our own with our own students. So it’s really good resource. I’ll make sure to link that too. All of that stuff will be linked below in the show notes. And also where can they find more about your teaching ideas in general just other than anchor charts too?
Amy: On Instagram you can find me by searching @theamygroesbeck. On Teachers Pay Teachers you can also find me just by searching my name, Amy Groesbeck. And then I’m also on Facebook and my educational blog under The Animated Teacher.
Ashley: Awesome. Well, I loved talking to you about this topic today. I think that people can definitely take something from this and either improve on anchor charts in their classroom, or maybe they were feeling kind of confused or not sure. And I think they can take a lot of these tips as well as your blog post will be a great tool. So thank you for coming on today and sharing more about anchor charts with us.
Amy: Well, thank you so much for having me. It was fun
Anchor Chart Must Haves:
Listener Spotlight

Subscribe and Review in iTunes
Have you subscribed to the podcast? I don’t want you to miss an episode and we have a lot of good topics and guests coming up! Click here to subscribe on iTunes!
If you are feeling extra kind, I would LOVE it if you left us a review on iTunes too! These reviews help other teachers find the podcast and I truly love reading your feedback. You can click here to review and select “Write a Review” and let me know what you love best about the podcast!
To download this episode to your computer click here.
 END OF YEAR ACTIVITIES!

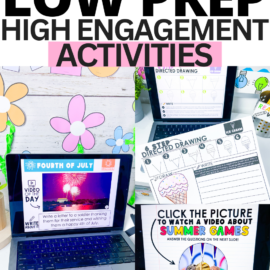
Hi! I worked with a seasoned teacher and she had a packet that was used for reading a story and answering questions. One was post it on Facebook, the other was Instagram and it was a clever way to get kids engaged. The bottom of the paper says Teach Create Motivate. I am hoping you can help me with where to find this packet?
I’m sorry, I would need more information on what was in the packet. Here is a link to my store and all of my reading resources. Maybe you can find the one that looks familiar: https://www.teacherspayteachers.com/Store/Teach-Create-Motivate/Category/Reading-208060